The Motion Picture Negative (IV): Processing, Printing and Laboratory Processes
ON FILM & DIGITAL · Technical Article
The Motion Picture Negative
Part IV: Processing, Printing and Laboratory Processes
By Ignacio Aguilar AEC, cinematographer
Versión en español: El Negativo Cinematográfico (IV): revelado, positivado y procesos de laboratorio
After exposure, a motion-picture negative still contains neither a visible image nor a projectable print. This fourth part follows the laboratory chain: latent image, normal processing, push processing, pull processing, printing, printer lights, OCN/IP/IN, generational loss and special laboratory processes.
Exposure as the first stage of the photochemical image
In the first three parts of this series we looked at how the camera, the emulsion, format, film speed, exposure, density and latitude determine the initial response of the negative. This fourth part moves to the next stage: processing and printing the motion-picture negative, meaning what happens after the negative has been exposed.
At that point the image is not finished. It is not even visible yet. The negative contains a latent image: an invisible photochemical trace that must be processed, timed and printed before it can become a projectable image. That is where the laboratory enters the authorship of the image.
The laboratory does not replace the cinematographer, but it is not a neutral formality either. Processing, printing, printer lights, photochemical duplication, contact printing, optical printing and special laboratory processes affect —or once affected— contrast, color, texture, grain, shadow cleanliness and the final shape of the highlights. In the purely photochemical workflow, now almost gone as an industrial standard, the image was not merely captured. It was made through a material chain.
Series: The Motion Picture Negative
- Part I: The Motion-Picture Camera, Film Stock and Color
- Part II: Format, Film Speed, Film Stocks and Grain
- Part III: Exposure, Light Metering, Density and Latitude
- Part IV: Processing, Printing and Laboratory Processes
- Part V: Scanning, 4K Restorations, Costs, Super 16mm/35mm and Digital Intermediate (DI)
The latent image: from invisible record to development
When light reaches the emulsion, a visible image does not yet appear on the film. What occurs is a microscopic alteration in the light-sensitive crystals. That alteration is the latent image: an invisible image that preserves the tonal and chromatic relationship of the exposed scene, but still needs development in order to become visible.
The final density of the negative does not fully exist at the moment of exposure. Exposure determines which areas of the emulsion received more or less light. Development turns that latent information into a visible negative image. For that reason, exposure and processing are not independent phases. The negative was not only exposed; it was exposed with an intended process and an intended print in mind.
In a color negative, the more exposed areas will become denser after processing. The less exposed areas will remain more transparent. That inversion is the basis of the negative-positive process: what was bright in the scene becomes dense on the negative, and what was dark remains less dense. The positive print, or a later interpretation of the negative, restores that relationship as a visible image with recognizable highlights, shadows and color.
Normal processing: turning the latent image into density
Normal processing is the reference point. In a standard workflow, the exposed negative is processed under controlled conditions of time, temperature, agitation, chemistry and transport. The purpose is not to create an arbitrary look, but to transform the latent image into a stable, predictable negative image.
When a cinematographer exposes a stock at its recommended index —for instance, 200T at 200 ASA— or at an EI chosen after testing, that exposure assumes a specific laboratory response. If the negative is processed normally, the relationship between exposure, density, contrast and color stays within the expected range for that emulsion. Unless otherwise instructed, the laboratory will assume normal processing.
This does not mean that the laboratory “creates” the exposure. If there is no information in the shadows, processing cannot invent it cleanly. If the highlights have been pushed too far, it cannot restore everything displaced outside the useful part of the curve without consequences. But processing can decisively shape how that information is presented: more or less contrast, more or less density, and a different balance between the color layers.
Color motion-picture negative is processed through a specific process, ECN-2. It should not be developed like a conventional C-41 still-photo roll, among other reasons because of the rem-jet backing and because of the chemical, mechanical and temperature requirements of the cinematographic process.
Practical idea
Normal processing is not the absence of a decision. It is the technical reference against which every later variation is measured: push processing, pull processing, special processes and printing.
Exposure and processing: two related decisions
A common confusion is to treat overexposure, underexposure, push processing and pull processing as variations of the same operation. They are not.
Overexposure or underexposure is a cinematographer’s decision made in camera. It affects the amount of light that reaches the negative. Push processing or pull processing is a cinematographer’s decision executed in the laboratory. It affects how the already exposed negative develops chemically, and how the image derived from that negative can be printed.
The distinction is fundamental. An underexposed negative processed normally will not have the same texture as an underexposed negative that has been pushed. It will also be dark. Likewise, an overexposed negative processed normally is not the same thing as an overexposed negative that has been pulled. It will carry too much exposure. In both cases, the relationship between camera and laboratory changes the result.
Exposure decides where the information is placed on the characteristic curve of the stock. Processing modifies the slope, density and, in some cases, the relationship between the color layers. Laboratory changes should therefore be tested before shooting if they are part of the visual design. They are not abstract corrections. They physically alter the structure of the image.

Push processing: pushing the negative
Push processing means increasing development time compared with normal processing. Traditionally, it has been used to compensate for real or deliberate underexposure by increasing the apparent density of the negative. It can also be used for its own visual consequences: more grain, more contrast, apparently stronger saturation, less shadow information and a harder image.
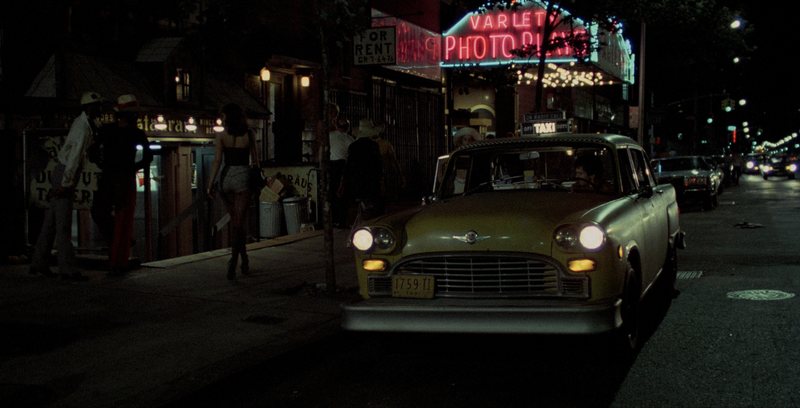
In classical films such as The French Connection (William Friedkin, 1971), Barry Lyndon (Stanley Kubrick, 1975) or Taxi Driver (Martin Scorsese, 1976), pushing the stock, or working at the edge of the available emulsion speed, was part of the visual response to very low light levels by the standards of the period. Common color stocks were around 100 ASA, so a one-stop push allowed a cinematographer to treat a stock as if it were 200 ASA, which became the practical reference on the meter.
The result, however, was not linear. Pushing one stop did not mean doubling sensitivity while preserving the same visual behavior. Grain, contrast, shadow hardness and certain color shifts could all increase. This is not mathematics. It is the specific chemical response of a given stock, exposure and laboratory.
Push processing can be a practical solution when there is not enough light or when the production needs to work below an ideal exposure level. It can also be an expressive decision. Even with enough light —for example, shooting day exteriors on Kodak 5207 250D with ND filters— a cinematographer may choose to push the negative for more contrast, grain or color intensity.
Practical idea
Pushing does not turn underexposure into normal exposure. It can help recover apparent density, but information that never reached the negative does not appear magically.
Pull processing: reducing development time
Pull processing means reducing development time compared with normal processing. It is usually associated with deliberately overexposed negatives or with situations where the cinematographer wants to reduce contrast. A simple example would be exposing Kodak 5219 500T at EI 250 ASA and asking the laboratory for a one-stop pull.
Pull processing tends to produce a softer image, with lower contrast and more controlled highlights. It can reduce harshness in scenes with a high contrast ratio, but it can also affect saturation, overall density and the sense of presence in the image. Taken too far, it may produce a slightly pale or washed image, with weaker blacks and less tonal energy.
Historically, pull processing has been useful when a cinematographer wanted to expose the negative generously, obtain cleaner shadows and then reduce development to contain the tonal scale. In Marie Antoinette (Sofia Coppola, 2006), photographed by Lance Acord, pull processing contributes to a softer, pastel, less aggressive image. In The Lives of Others (Florian Henckel von Donnersmarck, 2006), the technique works almost in the opposite direction: a desaturated, grayish image with controlled texture, reminiscent of 1970s thrillers.
Practical idea
Pull processing can soften contrast and contain highlights, but it is not a universal solution. It can also reduce saturation, weaken blacks and take presence away from the image.
| Process | What it modifies | Usual effect | Visual risk |
|---|---|---|---|
| Push | Increases negative development. | More apparent density, more contrast and saturation, more grain and a more tense image. | Harder shadows, less clean blacks, weaker shadow detail and possible color shifts. |
| Pull | Reduces negative development. | Lower contrast, lower saturation, more contained highlights and a softer image with less apparent grain. | Less tonal energy, weaker blacks, possible loss of saturation or a less dense image. |
Push and pull processing: rolls, magazines and short ends
Push and pull processing can be applied in two main ways on a feature film. The first is to push or pull only the material that needs it, or the material where a specific visual effect is wanted. This is flexible, but it can work against the overall consistency of the film if it is not carefully controlled.
The second is to apply the process to the entire film in order to maintain a common visual structure. The famous case is Eyes Wide Shut (Stanley Kubrick, 1999), shot on Kodak 5298 500T and pushed two stops, including day exteriors, to keep texture, contrast and grain structure consistent across the film.

In practical terms, push or pull processing should not be thought of as a shot-by-shot correction. It is applied to a physical unit of film: a roll, a reel, a downloaded magazine or a laboratory roll. It does not behave like a digital grading window that can be applied selectively to one isolated shot inside the same roll.
This has direct production consequences. If one scene must be processed normally and another must be pushed +1, the sensible approach is to separate them during shooting into different rolls or magazines, or at least to leave extremely clear instructions so the laboratory can identify and separate the material if the logistics allow it. What should be avoided is mixing shots in the same roll that require different chemical processes.
The camera report and the laboratory report are essential. Each roll should be identified with stock, roll number, footage, exposure index, requested process, camera notes and any relevant instruction for the dailies, rushes or scan. In photochemical work, part of postproduction begins before the material leaves the set.
Practical idea
If part of the material must be processed normally, another part pushed and another pulled, organize it as separate physical units. Do not treat it as if it were a later digital correction.
Changing magazines during shooting belongs to that same logic. A magazine is a light-tight unit. It can be removed from the camera even if the entire roll has not been used, as long as it is done correctly and identified properly. This makes it possible to alternate stocks, processes and exposure strategies: one magazine with 500T for interiors, another with 250D for day exteriors, another reserved for a +1 push, or a partially exposed short end to be resumed later.
Downloading a short end is different. That operation should be carried out by the camera assistant in a changing bag, changing tent or darkroom, with the material properly protected. The short end can be used later, but it increases the logistical complexity: head, tail, stock, exposed footage, remaining footage and processing instructions all have to be labeled.
Although it is common for a film to mix stocks, many cinematographers today prefer to use a single stock —especially with modern stocks such as 500T, which are far superior to their historical equivalents— in order to simplify continuity, avoid constant changes and reduce the risk of error.
From negative to positive: the printing stage
Once processed, the original negative is still not the finished film. It is the primary source of the image, but not the exhibition image. To be projected photochemically, the negative image must be converted into a positive image: a release print.
In the classical workflow, the original camera negative could be used to make workprints, dailies, answer prints or intermediate elements. But for the industrial distribution of a film, it was not reasonable to strike hundreds or thousands of prints directly from the original negative. Every pass through a printer involved wear, physical risk and possible irreparable loss. The original negative was the most valuable element of the film.
For that reason, a duplication chain was developed. From the original negative, an interpositive was made; from that interpositive, an internegative was generated; and release prints were struck from that internegative. This chain protected the original and made it possible to produce multiple prints for theaters. In the late 1990s or early 2000s, before photochemical distribution was progressively replaced by digital distribution, films such as Titanic (James Cameron, 1997) or Gladiator (Ridley Scott, 2000) could open simultaneously with around 3,000 prints in circulation. Protecting the negative was, literally, protecting the film: the original.
In the current hybrid workflow, photochemical printing and photochemical timing —even when the film is shot on negative— have largely been replaced by digital processes. Even filmmakers strongly associated with celluloid, such as Steven Spielberg, Quentin Tarantino or Paul Thomas Anderson, normally use a digital workflow. Christopher Nolan remains one of the most visible exceptions: on titles such as Dunkirk, Tenet and Oppenheimer, he has maintained a photochemical postproduction path connected to the workflow described below.
The classical photochemical workflow: contact printing and optical printing
Contact printing is the most direct method: negative and positive stock pass physically in contact through a printing light. It is the cleanest procedure when both elements have the same format and size, because it avoids optically rephotographing the image. For this to work, negative and positive must be the same size. This is the printing method that offers the highest quality.

Optical printing, by contrast, introduces a lens between the negative and the receiving stock. It is used when a format change, enlargement, reduction, reframing, title work, transitions or special duplication effects are required. It is a major procedure in the technical history of cinema, but it adds another optical generation and can therefore affect sharpness, grain and contrast. In a sense, it is like photographing a photograph: the negative is rephotographed onto positive stock.
That is why, on Blu-ray or 4K Blu-ray editions of older films, image quality is often lower during the opening titles and then visibly improves once the titles end. The titles may come from at least one additional optical generation, while the untitled footage may have been restored from a source much closer to the original negative. The same can happen with fades, dissolves, blue-screen effects, blow-ups, reductions and other optical effects.

When a film was shot in Super 16mm and had to be released in 35mm (The Texas Chain Saw Massacre, 1974), an optical blow-up was required. The same applied when a film was shot in Super 35 and a 35mm anamorphic release print was needed for projection in 2.39:1 or 2.4:1 (Greystoke, 1984). Today, many of those operations have been replaced by digital scanning and the Digital Intermediate (DI), which will be addressed in the next part of this article.
The printing method determines how the image is physically transferred. But the final print does not depend only on that transfer. It also depends on the light used to print it, its density and its color balance. This is where printer lights become essential.
Printer lights and photochemical color correction
In the photochemical workflow, color and density correction were carried out through printer lights. The color timer adjusted the amount of red, green and blue light used to print each shot or scene. Those adjustments changed the density and color balance of the positive print.
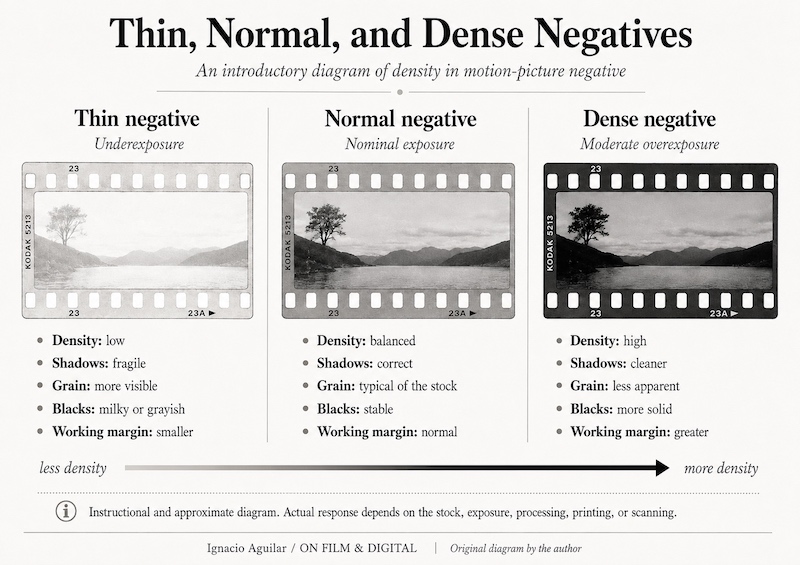
Final exposure and density corrections could also be made at this stage. If the negative was thin, stronger printer lights could be used to print it up. That meant weaker blacks, more visible grain and compromised image quality, although it could partially rescue an image that had reached the laboratory too dark.
The opposite was also possible: printing down. If Kodak 500T was exposed at EI 250 ASA, giving the negative one stop more exposure, and then processed normally —without a pull— the negative could arrive at the printing stage with substantial density. By printing it down with less intense printer lights, the print could return to a normal density while producing stronger color, more solid blacks, better contrast and less apparent grain.
Although this may seem conceptually close to pull processing, it does not produce the same result. Printing down from a generous negative starts from a source with more shadow information and greater density. The result can be richer and more solid than an excessively pulled image, which tends to be lower in contrast, lower in saturation and weaker in the blacks.

Conrad Hall and the logic of printing down:
Cinematographer Conrad Hall explained on several occasions that an essential part of his visual evolution came when he began overexposing the negative and printing it down. The idea can be summarized in a revealing phrase: “expose for the shadows, develop for the highlights”. In other words, expose so the shadows contain information, then control highlights and final density in the laboratory.
This was not simply a way of “darkening” the image. It was a strategy for obtaining shadows with more information, richer blacks, denser color and a more solid positive print. In that sense, printing down could function almost like a photochemical form of HDR: preserve information in the negative, then decide later, within the limits of printing, where the final image should settle.
This logic can be traced through Conrad Hall’s work from Butch Cassidy and the Sundance Kid to American Beauty: two distant moments linked by the same idea of exposing generously, protecting information and deciding the final density of the print later.
The function of printer lights may seem analogous to digital color correction, but it is not identical. In a photochemical system, the possibilities for intervention were more global and tied to the response of the emulsion, the print stock and the chemistry. There was no equivalent ability to isolate windows, skin tones, skies, precise areas of the frame or specific luminance ranges, as in a modern Digital Intermediate. It was a limited correction of image tone, color, density and brightness, generally better suited to matching shooting inconsistencies than to building a look from scratch, as digital grading can do.
Practical idea
Printing down is not the same as pull processing. In one case, negative development is reduced. In the other, an already processed source —usually denser and better informed— is printed lower.
OCN, IP, IN and release print
The vocabulary of the laboratory may seem technical, but it describes a very logical chain. The Original Camera Negative, or OCN, is the negative exposed in the camera. It is the primary source and the most valuable element. The Interpositive, or IP, is a positive element made from the original negative. The Internegative, or IN, is a duplicate negative generated from the interpositive. Release prints are the positive prints intended for theatrical projection.

| Element | Full name | Function | Visual impact |
|---|---|---|---|
| OCN | Original Camera Negative. | Original negative exposed in camera. | Primary source of texture, exposure, grain and latitude. |
| IP | Interpositive. | Positive element generated from the OCN. | Carries printing decisions and serves as the source for duplicate negatives. |
| IN | Internegative. | Duplicate negative generated from the IP. | Allows release prints to be struck without wearing the original negative. |
| Release print | Positive projection print. | Print intended for theatrical projection. | Visible result of the photochemical chain: contrast, color, grain and print density. |
Each generation introduces a transformation. Although intermediate stocks are designed to reproduce the image as faithfully as possible, photochemical duplication is never completely neutral. Small changes in contrast, color, apparent sharpness and grain can occur. The release print is not the original negative. It comes from a duplication chain —OCN, IP, IN and positive print— and belongs to a later material stage than the negative exposed in camera.
Generational loss and print texture
In a classical photochemical chain, the original camera negative was not necessarily what the audience saw. Between the camera and the theater, several generations could intervene: workprint, interpositive, internegative and release print. Each step was designed to preserve the image, but each step had a material consequence.
Generational loss should not be understood only as technical degradation. It is also part of the historical texture of many films. The release print introduces its own contrast, density, print grain, color response and projection limits. That is why a contemporary restoration from the OCN may reveal more information than an original release print, but not always reproduce the exact photochemical experience of the film’s first exhibition.
This distinction will matter in the next part, when we address contemporary scanning, 4K restorations and the Digital Intermediate (DI). The OCN may be the richest source, but the historical appearance of a film can also depend on how it was timed, duplicated and printed.

Special laboratory processes
Some laboratory processes, now largely obsolete except in very specific cases, deliberately modified the normal response of the film. They were not filters applied afterward, but physical alterations of the photochemical chain. They could affect contrast, saturation, black density, grain and tonal separation.
The key question is always the same: which element is being processed? Intervening on the original negative is not the same as intervening on an intermediate or on the positive print. The visual result, and the consequences for preservation, restoration or home-video reproduction, can be very different.
Bleach bypass, skip bleach and silver retention
Bleach bypass, or skip bleach, consists of omitting all or part of the bleaching stage, retaining metallic silver in the image. The usual result is higher contrast, denser blacks, much lower saturation and more apparent grain. Variants such as ENR and other silver-retention processes pursued related effects, with different results depending on the laboratory, the material and the point of application.
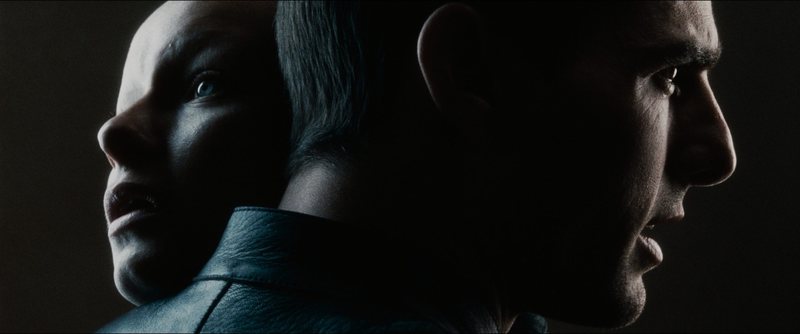
Reds (Warren Beatty, 1981), Once Upon a Time in America (Sergio Leone, 1984), The Last Emperor (Bernardo Bertolucci, 1987), Se7en (David Fincher, 1995), Minority Report (Steven Spielberg, 2002) and American Gangster (Ridley Scott, 2007) show different uses of silver retention or related processes.
Flashing and preflashing
Flashing or preflashing consists of exposing the negative or print stock to a controlled amount of light before or during the process. It can lift the shadows slightly, reduce contrast, alter saturation or introduce a colored tonal base. It is a delicate tool: controlled carefully, it can soften the image; used without precision, it can contaminate it.
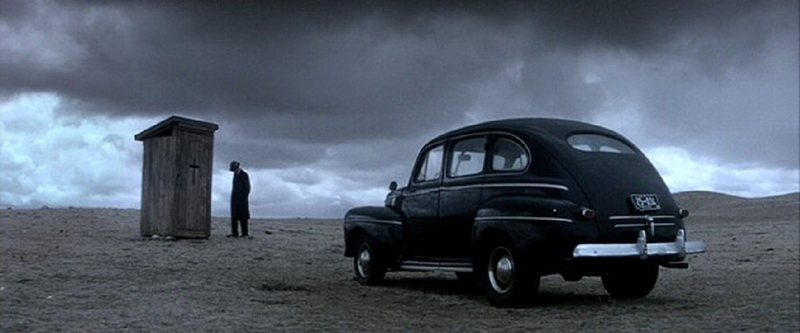
Freddie Young used it famously on The Deadly Affair (1966), and Vilmos Zsigmond turned it into a fundamental expressive tool on McCabe and Mrs. Miller (1971), The Long Goodbye (1973) and Heaven’s Gate (1980). Some laboratories used commercial variants, such as Chemtone, associated with films including Nashville (1975) and Taxi Driver (1976).
In Northfork (2003), M. David Mullen combined flashing and skip bleach. Flashing reduced contrast and saturation at the shooting stage; skip bleach, applied to the prints, restored black density and moved the image toward a silvery look with almost no residual color.
Processes on the negative and processes on the print
This distinction is essential because it defines which part of the chain is altered. If the process is applied to the negative, it affects everything generated afterward. If it is applied to the print, it can be decisive in the exhibition look without being present in earlier elements of the chain.
A good example is 1984 (Michael Radford, 1984). Roger Deakins applied a bleach-bypass-type process to the prints, at the final part of the chain. By omitting the bleach during print manufacture, metallic silver was retained in the positive image, reducing saturation and hardening contrast until the film acquired an almost monochrome appearance, with silvery blacks and severely restrained color. That is why some home-video editions, sourced from elements made before the print process was applied, could retain more color than the original photochemical intention.
Practical idea
It is not enough to say “bleach bypass,” “flashing” or “silver retention.” You have to know whether the process was applied to the negative, an intermediate or the print. The point of application changes the image, and it also changes later restoration.
Cross processing
Cross processing is worth mentioning only laterally within a discussion of color motion-picture negative. Processing a stock in chemistry other than the one for which it was designed can generate strong increases in contrast, saturation or color shifts, but it is not part of the standard cinematographic laboratory workflow. It is an extreme decision, closer to a deliberate alteration of the process than to a general cinematography tool.
Key points
- The exposed negative contains a latent image, not a visible image.
- Processing transforms that latent image into negative density.
- Exposing in camera and processing in the laboratory are related decisions, but they are not equivalent.
- Normal processing is the technical reference from which push processing, pull processing and other laboratory processes depart.
- Push processing can add apparent density, contrast, grain and hardness, but it does not invent information absent from the negative.
- Pull processing can soften contrast, contain highlights and reduce apparent grain, but it can also weaken blacks and saturation.
- Push processing, pull processing, magazines, short ends and camera reports must be planned as part of the same photochemical logistics.
- Printing converts the processed negative into a visible, projectable positive print.
- Printer lights adjust density and color balance, but they are not equivalent to modern digital color grading.
- The OCN is the original and most valuable element; IP and IN allow the film to be duplicated and distributed while protecting that original.
- Each photochemical generation can transform contrast, grain, color, sharpness and print texture.
- Processes such as bleach bypass, ENR, flashing or preflashing are material laboratory decisions, and their effect depends on whether they are applied to the negative, an intermediate or the print.
Conclusion: the laboratory as part of the image
The motion-picture negative does not end in the camera. The camera begins the image, but the laboratory turns it into a visible, reproducible and projectable form.
Across this part of the series, we have followed the negative from the latent image to processing, printing, duplication and special laboratory processes. Understanding that chain allows us to look at photochemical cinema more precisely: not as an image captured once and for all, but as an image built through layers, decisions and successive transformations.
That is why the laboratory was not a secondary or merely technical stage. It was an active part of the material authorship of the image: the place where exposure became density, density became print and the print became a cinematic experience.
In photochemical cinema, the image was not finished when the camera stopped. It completed itself in the laboratory.
The next part of the series will address what happens when that processed negative enters a contemporary workflow: scanning, dailies, Super 16mm, 35mm, archiving, approximate costs, 4K restorations and the Digital Intermediate (DI).
Also on ON FILM & DIGITAL
Sources and related reading
- Kodak Motion Picture Film. Technical documentation on film stocks, processing, laboratory processes and photochemical workflows.
- Kodak Motion Picture Film Labs. General reference on processing, printing, scanning and handling photochemical film material.
- American Cinematographer Manual. Technical reference on exposure, laboratory practice, printing, intermediate elements and photochemical cinematography.
- American Cinematographer. Articles and interviews on push processing, pull processing, special laboratory processes, flashing, bleach bypass and classical photochemical workflows.
- Benjamin Bergery, Reflections: Twenty-One Cinematographers At Work. Especially useful for the professional approach to camera and laboratory testing, which will be developed in greater detail in the next part.
- Author’s own teaching materials on motion-picture negative, sensitometry, light metering, exposure, processing, printing, printer lights and special laboratory processes.
The Author
Ignacio Aguilar, AEC is a Spanish cinematographer based in Madrid. His work spans feature films, television, commercials and technical writing on cinematography, with experience in digital cinema, 16mm and 35mm film, anamorphic lenses, large-format digital capture and practical lens testing.
Read more articles and reviews in Spanish at ON FILM & DIGITAL, or visit the main cinematography portfolio at ignacioaguilardop.com.
ON FILM & DIGITAL
© Ignacio Aguilar, 2026.